Snowflake Plugin
Note: Ask DataHub Plugins is currently in Private Beta. To enable this feature, please reach out to your DataHub customer support representative.
The Snowflake Plugin connects Ask DataHub to a Snowflake-managed MCP server, enabling conversational analytics directly from the chat. DataHub acts as the semantic layer — helping the AI find the right data — while Snowflake serves as the data layer — letting the AI actually query and analyze it.
Why Connect Snowflake?
With the Snowflake plugin enabled, Ask DataHub can:
- Conversational analytics — ask questions in plain language and get answers backed by real data. DataHub finds the right tables using metadata (descriptions, ownership, lineage), then Snowflake executes the query. No additional metadata or semantic modeling required.
- Data exploration — understand dataset structure, preview sample data, and inspect column values to evaluate data quality or fitness for a use case.
- Data debugging — investigate data issues detected by DataHub assertions by inspecting the actual data: check for nulls, duplicates, unexpected values, or freshness problems at the source.
Because the plugin uses OAuth, each user authenticates with their own Snowflake credentials. Users only see data they are authorized to access — no need to manage separate policies or grants in DataHub.
Example prompts:
- "Query the top 10 customers by revenue this quarter"
- "How many null values are in the email column of the customers table?"
- "Compare last month's sales to this month across regions"
- "Show me 5 sample rows from the orders table"
Prerequisites
- A Snowflake account with
ACCOUNTADMIN(or equivalent privileges to create MCP servers, security integrations, and grant roles) - DataHub Cloud with Ask DataHub Plugins enabled
- Platform admin access in DataHub to configure the plugin
Admin Setup
The Snowflake plugin uses User OAuth authentication — each user authenticates with their own Snowflake account. Setup involves creating an MCP server and OAuth security integration in Snowflake, then configuring the plugin in DataHub.
Step 1: Create an MCP Server in Snowflake
Create an MCP server in Snowflake with the tools you want to expose. We recommend starting with SYSTEM_EXECUTE_SQL, which lets Ask DataHub run SQL queries directly against your warehouse:
| Tool Type | Purpose |
|---|---|
SYSTEM_EXECUTE_SQL | Recommended. Execute SQL queries directly against the warehouse. This is the minimum required tool for the plugin to be useful. |
CORTEX_ANALYST_MESSAGE | Natural language analytics over Cortex Analyst semantic views — a curated BI/analytics layer on top of raw SQL. |
CORTEX_AGENT_RUN | Invoke Cortex Agents as sub-agents from within Ask DataHub. |
Snowflake supports additional tool types as well. You can include multiple tools in a single MCP server.
Example: Create a server with SQL execution and a Cortex Analyst semantic view:
USE ROLE ACCOUNTADMIN;
USE DATABASE YOUR_DATABASE;
USE SCHEMA YOUR_SCHEMA;

CREATE OR REPLACE MCP SERVER YOUR_MCP_SERVER
  FROM SPECIFICATION $$
    tools:
      - name: "execute_sql"
        type: "SYSTEM_EXECUTE_SQL"
        description: "Execute SQL queries against the data warehouse"
        title: "SQL Executor"
      - name: "revenue_analytics"
        type: "CORTEX_ANALYST_MESSAGE"
        identifier: "YOUR_DATABASE.YOUR_SCHEMA.REVENUE_SEMANTIC_VIEW"
        description: "Analytics over revenue and sales data"
        title: "Revenue Analytics"
  $$;
Snowflake MCP servers are scoped to a single database. If you need Ask DataHub to query across multiple databases, create a separate MCP server (and plugin) for each one.
Step 2: Grant Access
Grant usage on the MCP server to the roles that should be able to use it:
GRANT USAGE ON DATABASE YOUR_DATABASE TO ROLE YOUR_ROLE;
GRANT USAGE ON SCHEMA YOUR_DATABASE.YOUR_SCHEMA TO ROLE YOUR_ROLE;
GRANT USAGE ON MCP SERVER YOUR_DATABASE.YOUR_SCHEMA.YOUR_MCP_SERVER TO ROLE YOUR_ROLE;
Step 3: Create an OAuth Security Integration
Create a security integration to use Snowflake as an OAuth provider. Enable refresh tokens and set the redirect URI to your DataHub instance's OAuth callback:
CREATE OR REPLACE SECURITY INTEGRATION YOUR_INTEGRATION_NAME
  TYPE = OAUTH
  ENABLED = TRUE
  OAUTH_CLIENT = CUSTOM
  OAUTH_CLIENT_TYPE = 'CONFIDENTIAL'
  OAUTH_REDIRECT_URI = 'https://<your-datahub-url>/integrations/oauth/callback'
  OAUTH_ISSUE_REFRESH_TOKENS = TRUE
  OAUTH_REFRESH_TOKEN_VALIDITY = 7776000;
The OAUTH_REDIRECT_URI must match the OAuth Callback URL shown in the DataHub plugin creation form exactly (e.g. https://your-org.acryl.io/integrations/oauth/callback). You can copy this URL from the form when creating the plugin in Step 5.
Make sure OAUTH_ISSUE_REFRESH_TOKENS is set to TRUE. Without refresh tokens, users will need to re-authenticate frequently.
Step 4: Collect Authentication Details
Run the following queries to gather the information you'll need for DataHub:
OAuth Client Credentials:
SELECT SYSTEM$SHOW_OAUTH_CLIENT_SECRETS('YOUR_INTEGRATION_NAME');
This returns a JSON object containing OAUTH_CLIENT_ID and OAUTH_CLIENT_SECRET.
MCP Server URL:
The URL follows this format:
https://<account-url>/api/v2/databases/<DATABASE>/schemas/<SCHEMA>/mcp-servers/<SERVER_NAME>
Use hyphens (-) instead of dots (.) in the account locator portion of the URL. For example, if your account locator is abc12345.us-east-1, your URL would use abc12345-us-east-1.snowflakecomputing.com.
At this point, you should have the values needed for the DataHub configuration:
| Value | Source |
|---|---|
| MCP Server URL | Constructed from your account URL, database, schema, and server name (see format above) |
| Client ID | From SYSTEM$SHOW_OAUTH_CLIENT_SECRETS output |
| Client Secret | From SYSTEM$SHOW_OAUTH_CLIENT_SECRETS output |
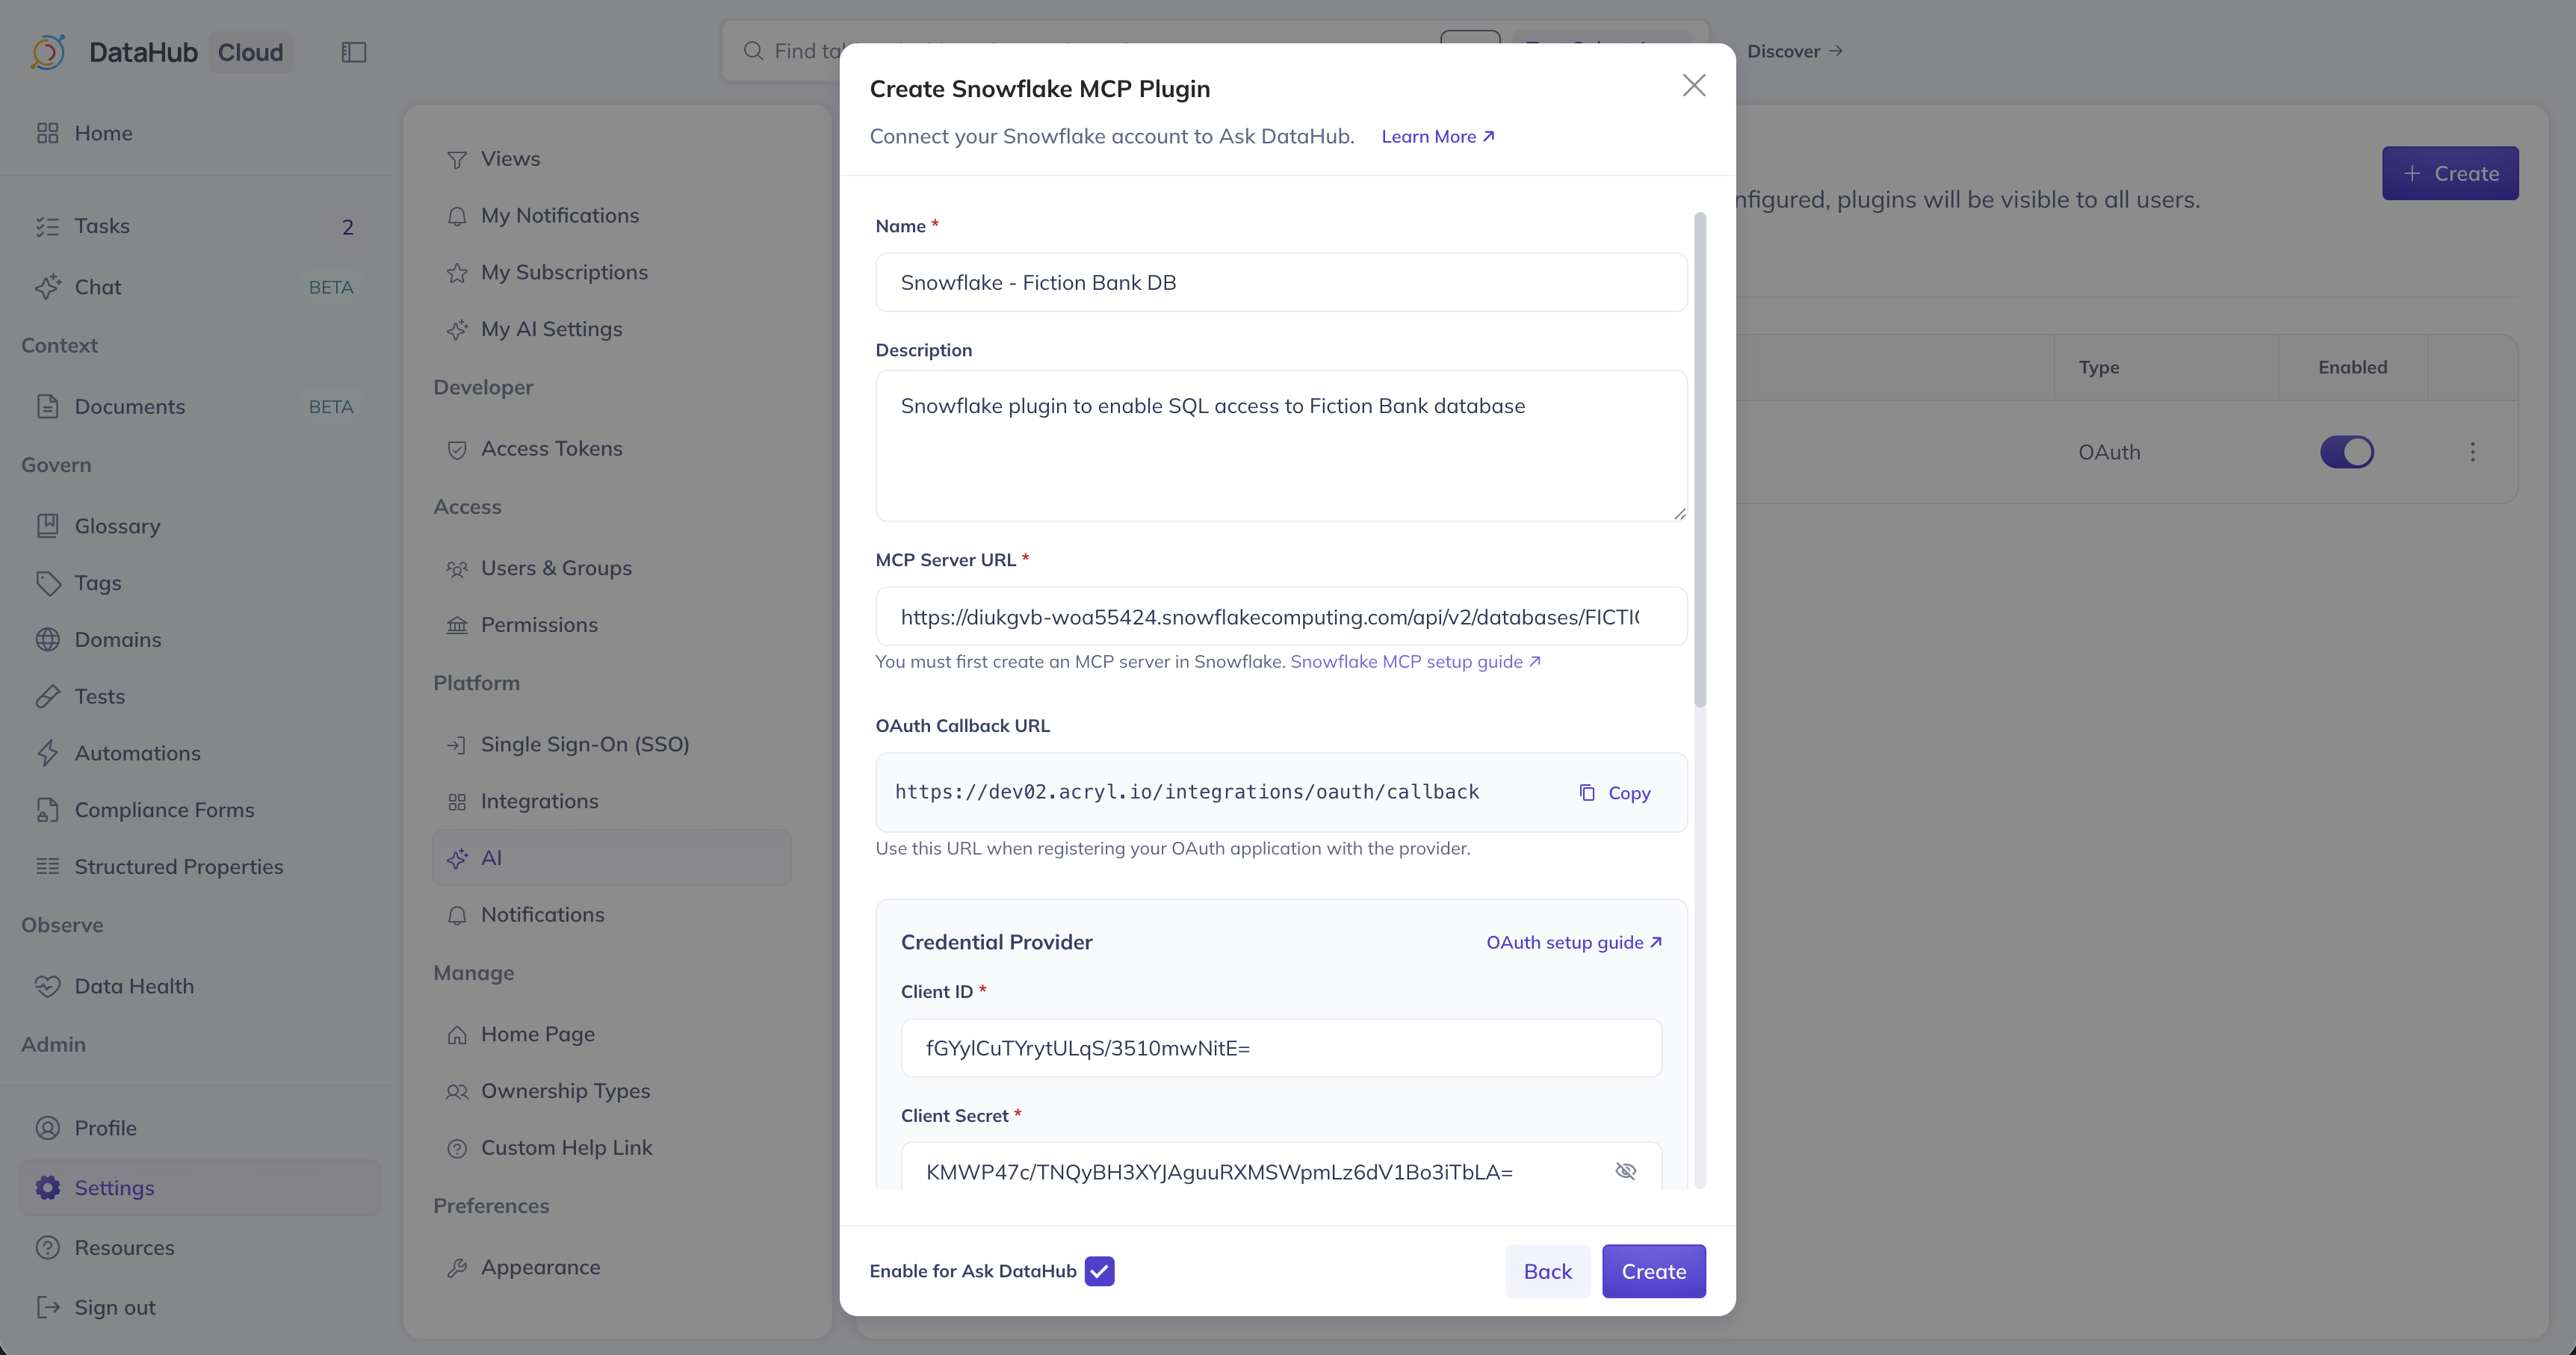
Step 5: Create Plugin in DataHub
- Navigate to Settings > AI > Plugins in DataHub
- Click + Create and select Snowflake MCP
- Fill in the plugin details:
| Field | Value |
|---|---|
| Name | Snowflake |
| Description | A description for the plugin |
| MCP Server URL | The URL from Step 4 |
| Client ID | From Step 4 |
| Client Secret | From Step 4 |
| Default Scopes | refresh_token session:role:<ROLE_NAME> |
The session:role:<ROLE_NAME> scope determines which Snowflake role the user assumes when connected. Replace <ROLE_NAME> with the role you granted MCP server access to in Step 2 (e.g. session:role:DATA_ANALYST). If omitted, the user's default role is used — which may not have access to the MCP server. Each user must have the specified role granted to them in Snowflake, and the role must not be in the security integration's blocked roles list (see Troubleshooting).
- Optionally add Instructions for the AI Assistant, ensure Enable for Ask DataHub is on, and click Create
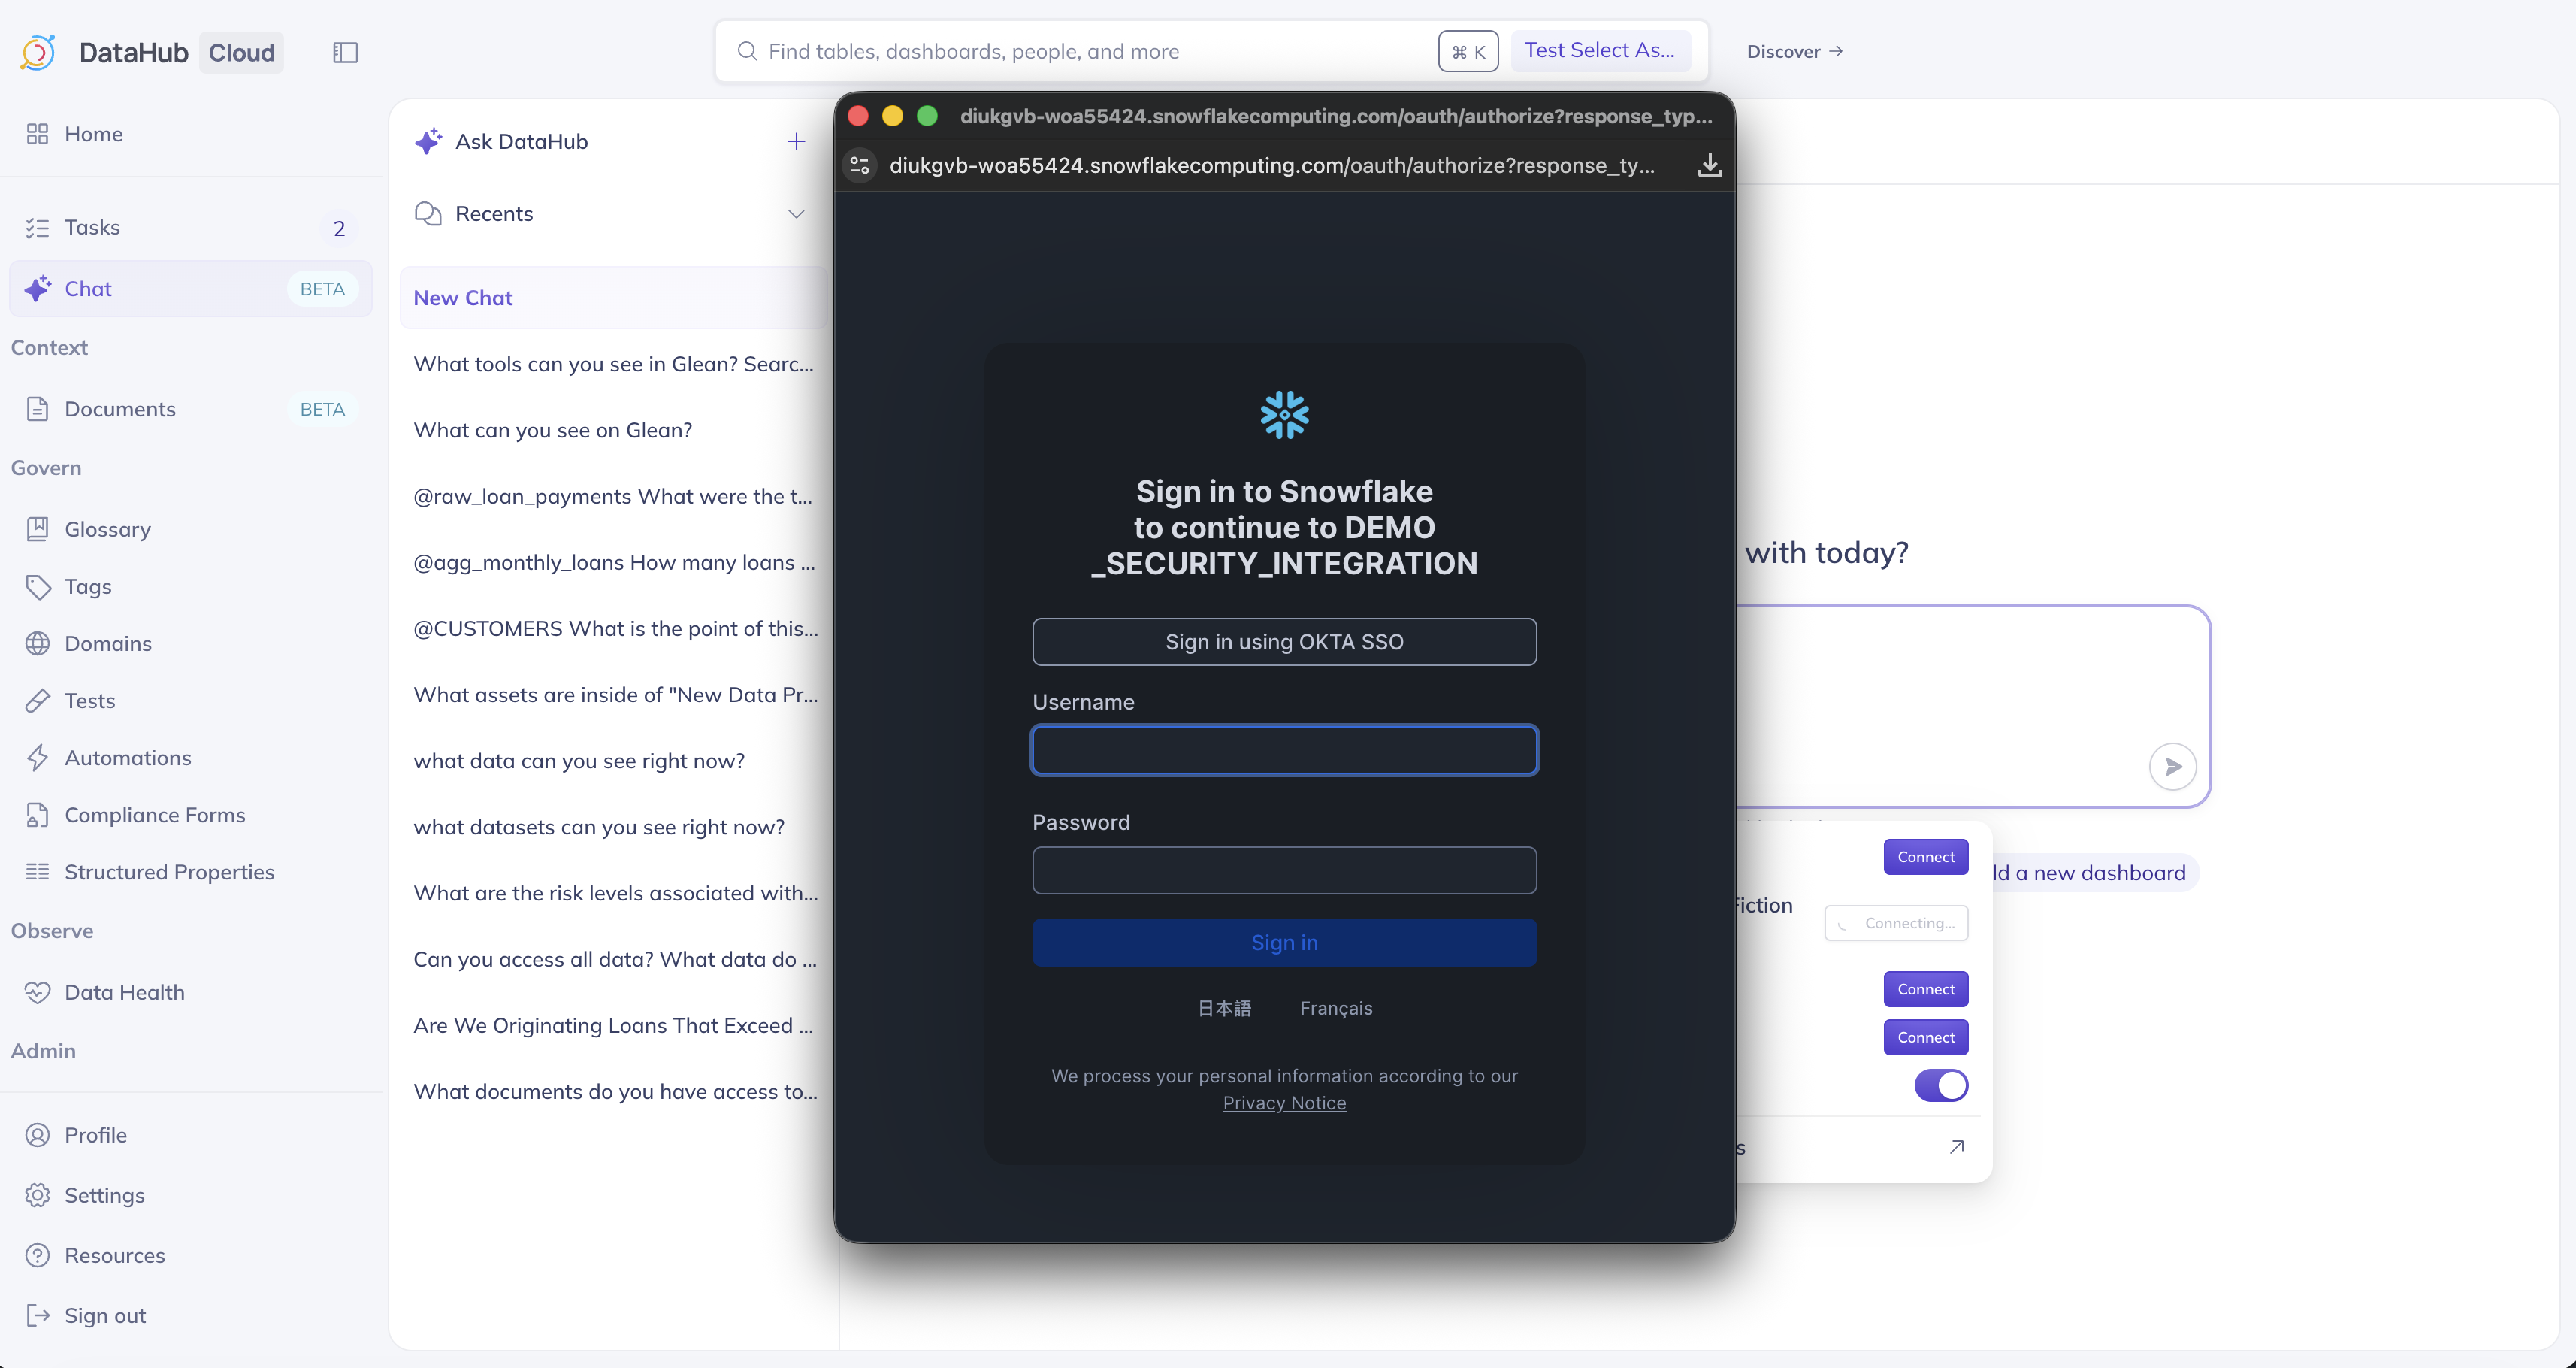
User Setup
Navigate to Settings > My AI Settings, find the Snowflake plugin, and click Connect. You'll be redirected to Snowflake to authenticate, then back to DataHub. See the overview for more details.
Troubleshooting
Users can't log in / OAuth fails
The OAuth security integration may be blocking the user's role. Ensure the role you want to assume is not in the blocked roles list:
ALTER SECURITY INTEGRATION "YOUR_INTEGRATION_NAME"
  SET BLOCKED_ROLES_LIST = ();
Query failures
- Verify the user's Snowflake role has
SELECTaccess to the target tables - Ensure the user has
USAGEgranted on the MCP server - Check that the warehouse is running and not suspended
Token expiration
If users are being asked to re-authenticate frequently, verify that refresh tokens are enabled on the security integration (OAUTH_ISSUE_REFRESH_TOKENS = TRUE) and that OAUTH_REFRESH_TOKEN_VALIDITY is set to an appropriate duration.